
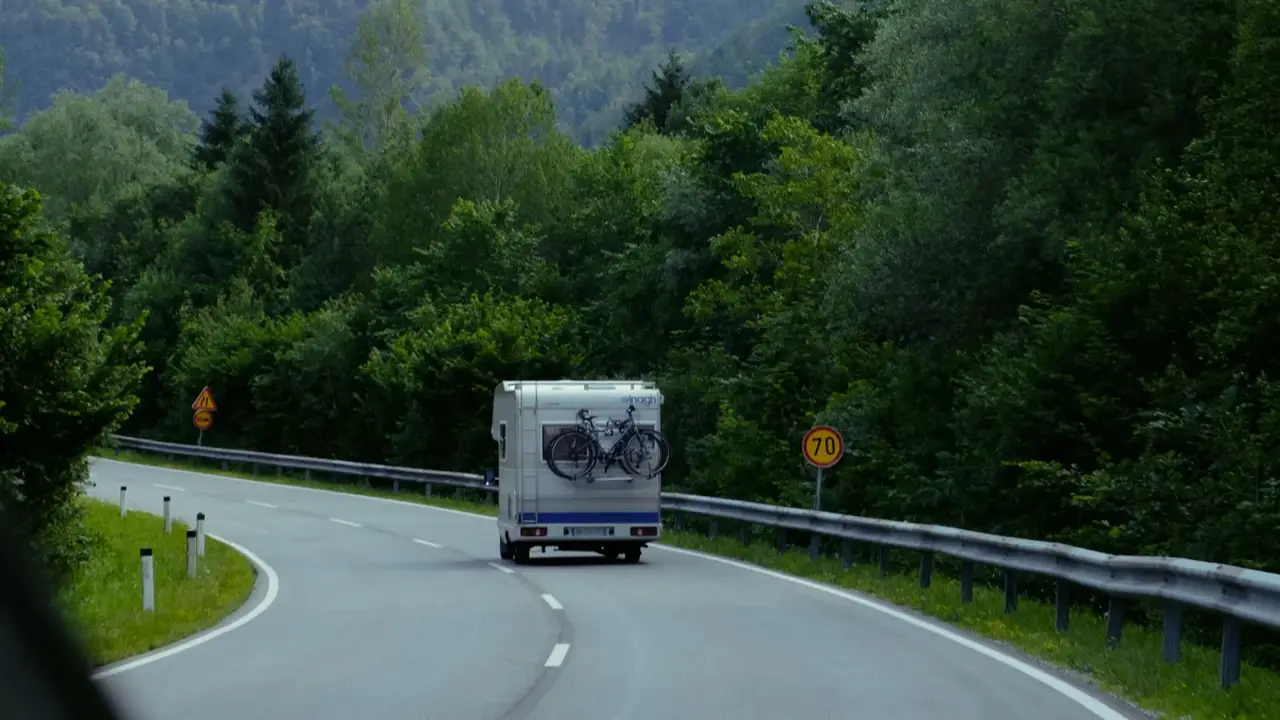
A successful week of RV camping starts before you leave the driveway. The goal is not merely to arrive at the campground - it is to arrive safely, keep the RV operating reliably, have the right supplies for meals and outdoor activities, and avoid turning small preventable problems into a trip-ending inconvenience.
For a stay at a full-service campground such as DeSoto Bluffs Campground, where you can expect electric, water, and site-based campground conveniences, preparation is simpler than boondocking. Still, you should arrive self-sufficient enough to manage a delayed check-in, a storm, a power interruption, a closed local store, or a long day of hiking, climbing, fishing, and outdoor activity.
This guide includes pre-trip RV checks, towing and driving safety, hiking and climbing equipment preparation, and a practical one-week provision checklist.
Important: This is a general planning guide, not a substitute for your RV owner’s manual, tow-vehicle manual, tire placard, professional maintenance, or local campground rules. If you find a tire defect, brake problem, propane leak, damaged hitch component, or electrical concern, correct it before departure.
The One-Week RV Trip Timeline
Avoid trying to do every task on departure morning. A calm, staged system is safer and more effective.
| When | Focus | Key tasks |
|---|---|---|
| 7–14 days before | Maintenance and reservations | Confirm reservation, campsite type, RV length limits, hookups, weather, route, insurance, and maintenance needs |
| 3–7 days before | Equipment and provisions | Test safety gear, inspect outdoor equipment, create meal plan, purchase nonperishable food, refill propane, and organize tools |
| 24–48 hours before | Systems and loading | Check tires, batteries, water, propane, appliances, lights, towing equipment, food temperatures, and packing |
| Departure morning | Final walk-around | Check hitch, lights, tires, awnings, compartments, slides, doors, roof items, interior tie-downs, and route |
| At the campsite | Safe setup | Level RV, chock wheels, connect utilities carefully, check for leaks, verify electrical protection, and review campground rules |
| Daily at camp | Preventive habits | Monitor weather, food temperature, water/tank levels, equipment condition, pet safety, and outdoor plans |
RV Pre-Trip Safety Checklist
Tires, wheels, brakes, and suspension
Tires are among the most important RV safety systems. Check them when cold and use the pressure listed on the RV’s certification label, placard, or owner’s manual—not simply the maximum pressure molded into the tire sidewall. Inspect every tire, including the spare, for low pressure, uneven tread wear, cracks, sidewall bulges, cuts, dry rot, exposed cords, and signs of separation. Also confirm that the spare is inflated and that your jack, lug wrench, and tools are accessible.
RV tire and wheel checklist
- Check cold tire pressure on every RV tire and tow-vehicle tire.
- Use the manufacturer-specified pressure for the actual vehicle and axle configuration.
- Inspect tread depth and tread wear for uneven patterns.
- Look for cracks, weather checking, cuts, bulges, blisters, sidewall damage, or embedded debris.
- Confirm tire age using the DOT date code; replace aging or questionable tires according to manufacturer guidance and professional inspection.
- Inspect valve stems and valve caps.
- Verify that lug nuts are torqued to the manufacturer’s specification.
- Confirm the spare tire is inflated, undamaged, secured, and accessible.
- Confirm the jack, lug wrench, wheel chocks, leveling blocks, and roadside tools are onboard.
- Test the tire-pressure-monitoring system, if installed.
- For towables, inspect axles, suspension components, wheel bearings, brake wiring, and breakaway cable.
Do not tow or drive an RV with a damaged tire, unexplained vibration, brake warning, visible bearing grease, loose wheel, or questionable hitch connection. A roadside inspection is far easier than a roadside failure.
Hitch, towing, and connection checklist
For travel trailers and fifth wheels, hitching errors can have serious consequences. Build a consistent hitching sequence and do not allow distractions during the process.
- Confirm tow-vehicle towing capacity, payload, hitch rating, and cargo limits are not exceeded.
- Verify trailer loaded weight and tongue/pin weight are appropriate for the towing setup.
- Inspect hitch receiver, ball mount, coupler, weight-distribution system, fifth-wheel hitch, kingpin, and safety components.
- Confirm coupler is fully seated and locked on the ball, or kingpin is correctly locked in the fifth-wheel hitch.
- Install the hitch pin or locking device.
- Attach safety chains in a crossed configuration beneath the coupler, where applicable.
- Attach the breakaway cable directly to the tow vehicle—not to safety chains or the hitch ball.
- Connect the electrical umbilical cord and test trailer lights.
- Test brake controller function before entering highway traffic.
- Raise and secure tongue jack, stabilizers, steps, and leveling equipment.
- Remove all wheel chocks only after the trailer is properly connected and the tow vehicle is ready to move.
- Secure propane cylinders, battery box, cargo rack, bicycles, and exterior storage doors.
- Confirm awning is fully retracted, locked, and travel-secured.
Motorhome chassis and engine checklist
If you drive a motorhome, include the normal vehicle safety checks plus RV-specific systems.
- Check engine oil, coolant, transmission fluid where accessible, windshield washer fluid, and brake fluid as directed by the chassis manual.
- Check belts, hoses, leaks under the vehicle, and battery connections.
- Inspect windshield wipers and washer operation.
- Confirm headlights, brake lights, turn signals, marker lights, and hazard lights operate.
- Check mirrors, backup camera, dash warnings, and tire-pressure-monitoring system.
- Confirm fuel level and route-specific fuel-stop plan.
- Verify that all rooftop items, vent covers, antennas, satellite equipment, and cargo are secured for travel.
- Know the RV’s height, width, length, and weight—and enter those figures into an RV-appropriate route planner.
Propane, Fire, and Electrical Safety
Your RV should have working smoke, carbon monoxide, and LP/propane detectors. Test them before travel and replace weak batteries as required. Also verify that your fire extinguisher is charged, in date, unobstructed, and reachable near the exit. RV safety checklists commonly include the same core equipment: fire extinguisher, smoke detector, carbon monoxide detector, propane detector, first-aid kit, reflective triangles or flares, tire gauge, and basic tools.
Propane system checklist
- Inspect propane cylinders for visible rust, dents, damage, or expired certification issues.
- Confirm cylinders are secured upright in the proper ventilated compartment.
- Check hoses, pigtails, regulator, fittings, and valves for cracking, corrosion, or damage.
- Verify shutoff valves operate properly.
- Use a soap-and-water solution on accessible fittings to look for bubbles that could indicate a leak.
- Never use a flame to check for a propane leak.
- Confirm the furnace, stove, water heater, refrigerator, and other propane appliances operate correctly before departure.
- Know where the emergency propane shutoff valve is located.
- If you smell propane or suspect a leak, turn off the supply if safe to do so, ventilate the RV, avoid ignition sources, and obtain qualified service before traveling.
A soapy-water leak check and pre-trip appliance test are widely recommended. If you identify a leak or unexplained propane odor, do not depart until the system has been inspected and repaired.
Fire and emergency equipment checklist
- Test smoke detector.
- Test carbon monoxide detector.
- Test LP/propane detector.
- Verify fire extinguisher charge indicator is in the safe range.
- Verify fire extinguisher is mounted, accessible, and within service date.
- Carry a second compact ABC-rated extinguisher near the kitchen or exterior storage area if appropriate.
- Pack a first-aid kit suited to your group’s needs.
- Pack reflective warning triangles, high-visibility vest, flashlight/headlamp, and spare batteries.
- Carry a charged power bank and vehicle phone charger.
- Store emergency contacts, roadside-assistance information, insurance documents, and RV manuals in a known location.
- Review exit routes with everyone traveling in the RV.
- Confirm windows and emergency exits open as designed and are not blocked by luggage or gear.
Shore power and electrical setup
At a full-service campground, electrical hookups add comfort but require attention.
- Confirm whether your site has 30-amp, 50-amp, or other service before arrival.
- Carry appropriate adapters, but avoid overloading the circuit with unsuitable adapters or extension cords.
- Use a quality RV surge protector or electrical-management system.
- Inspect power cord and plug for heat damage, bent prongs, fraying, or corrosion.
- Before connecting, check campground pedestal condition and avoid visibly damaged outlets.
- Turn off or reduce major RV loads before connecting or disconnecting shore power.
- Connect surge protection to the pedestal first, then connect the RV power cord.
- Confirm correct polarity, grounding, and voltage readings if your electrical-management system provides them.
- Keep electrical connections protected from standing water.
- Never run a generator in or near an enclosed space, under the RV, near open windows, or where exhaust can enter the RV or a neighboring campsite.
Water, Sewer, and Appliance Readiness
Freshwater and plumbing checklist
- Sanitize the fresh-water system if indicated by the RV manufacturer or after extended storage.
- Fill or partially fill the fresh-water tank as appropriate for trip needs and towing weight.
- Pack a potable-water hose, pressure regulator, inline water filter, hose elbow, and quick-connect fittings.
- Use only a designated drinking-water hose for potable water.
- Inspect hoses for cracks, leaks, or damaged fittings.
- Test water pump and inspect for leaks.
- Verify water heater operation on the intended power source.
- Carry a basic plumbing repair kit: washers, hose ends, thread tape, spare fittings, and a small tool set.
- Know whether campground water pressure is regulated; use a pressure regulator to protect RV plumbing.
Sewer and waste-tank checklist
- Pack sewer hose, support, fittings, clear elbow, disposable gloves, disinfecting wipes, and tank treatment if used.
- Check sewer hose for cracks, pinholes, weak fittings, or damaged seals.
- Verify black and gray tank valves move properly.
- Ensure dump caps are secure before travel.
- Do not leave the black-tank valve continuously open while connected at a full-hookup campsite; doing so can allow liquids to drain away while solids remain, increasing the risk of blockage.
- Carry enough toilet paper designed for RV or septic systems.
- Know the campground’s sewer connection and dumping rules before setup.
Refrigerator and food-safety checklist
Pre-cool the refrigerator before packing perishable food. Keep refrigerated foods at 40°F or below; the FDA Food Code specifies 41°F or below for refrigerated time/temperature-control-for-safety foods. Use a refrigerator thermometer rather than relying only on a dial or display.
- Run refrigerator on the appropriate power source before departure.
- Place refrigerator and freezer thermometers inside.
- Confirm refrigerator temperature is at or below 40°F; aim for 41°F or below as a food-safety threshold.
- Confirm freezer temperature is 0°F or below when possible.
- Pack raw meats in leakproof containers on the lowest shelf.
- Separate ready-to-eat food from raw meat, poultry, seafood, and eggs.
- Bring coolers and ice packs for travel-day overflow or beverages.
- Keep food out of the temperature “danger zone” between 40°F and 140°F.
- Do not leave perishable food at room temperature for more than two hours—or more than one hour if outdoor temperatures exceed 90°F.
- Pack a refrigerator backup plan for a power interruption: cooler, ice, thermometer, and shelf-stable meals.
Hiking Equipment Checklist
A full-service campground can be a comfortable basecamp for day hikes, but hiking safety begins before leaving the RV. Match your route and equipment to your fitness, experience, weather, terrain, daylight, and group’s abilities.
The National Park Service advises hikers to know their limits, stay on designated trails, and carry the Ten Essentials—including navigation, insulation, illumination, first aid, fire, repair tools, nutrition, hydration, and emergency shelter.nps+1
Hiking safety equipment
- Trail map, downloaded offline map, and route description.
- Compass and knowledge of how to use it.
- Fully charged phone in a waterproof case.
- Backup battery/power bank.
- Headlamp with spare batteries or a fully charged backup.
- First-aid kit with blister care, bandages, antiseptic, pain medication if appropriate, and personal medications.
- Whistle.
- Emergency blanket or emergency bivy.
- Lighter and waterproof matches, where lawful and appropriate.
- Multitool or small knife.
- Duct tape or gear-repair tape.
- Two liters or more of water as conditions require.
- Water filter or purification backup for longer routes where refill is planned.
- Extra food beyond the planned snack/lunch.
- Sunscreen, sunglasses, brimmed hat, and insect repellent.
- Rain shell and insulating layer.
- Trekking poles for steep, wet, rocky, or long-distance terrain.
- Hiking shoes or boots with adequate traction.
- Spare dry socks in a waterproof bag.
Hiking pre-departure checks
- Check weather, including storm timing, heat index, wind, and lightning risk.
- Confirm trail conditions, closures, water crossings, and parking access.
- Tell someone where you are going and when you expect to return.
- Choose a route suitable for the least experienced person in the group.
- Start early enough to finish well before dark.
- Confirm phone battery, headlamp, and GPS/offline maps are ready.
- Inspect shoe soles, laces, trekking-pole locks, water reservoir, and pack straps.
- Review turnaround time before beginning the hike.
- Do not rely on cellular service as your only navigation or emergency plan.
- Stay on designated trails to reduce the risk of getting lost and to protect sensitive natural resources.
Rock Climbing Equipment Checklist
Rock climbing should be approached as a technical activity, not simply an extension of hiking. Use only established climbing areas where climbing is permitted, confirm access rules and route information, and climb within your verified skill level.
The National Park Service recommends that climbers double-check anchors, knots, harnesses, fixed gear, and all safety equipment before beginning a climb—and emphasizes that climbers should always wear helmets because falls and rockfall can occur on any terrain.
Essential climbing equipment
- Climbing helmet for every climber and belayer.
- Properly fitting harness.
- Climbing shoes suited to the planned terrain and route.
- Dynamic climbing rope appropriate for the route and climbing style.
- Belay device and locking carabiner.
- Personal tether or anchor system where appropriate.
- Quickdraws, slings, carabiners, cordelette, and anchor-building gear as route and experience require.
- Chalk bag and chalk, if desired.
- Rope bag or tarp to keep rope off dirt and moisture.
- Route guidebook, downloaded topo, or verified route information.
- First-aid kit, headlamp, emergency layer, water, and food.
- Communications plan and location-sharing plan.
- Repair tape, knife/multitool, and gear-inspection knowledge.
Climbing equipment safety checks
- Inspect helmet for cracks, dents, damage, or compromised foam.
- Inspect harness webbing, belay loop, tie-in points, stitching, and buckles.
- Inspect rope for core exposure, flat spots, severe fuzzing, stiffness, contamination, or damage.
- Check carabiner gates, locking mechanisms, and sharp edges.
- Inspect slings, quickdraw dogbones, webbing, and cordage for cuts, fraying, UV damage, or chemical contamination.
- Check belay device for wear, deformation, and compatibility with rope diameter.
- Inspect anchors and fixed gear critically; do not assume fixed hardware is safe merely because it is present.
- Verify climbing knot, harness buckles, belay setup, rope ends, and anchor system through a partner check before every climb.
- Confirm all members understand communication commands.
- Carry enough water, food, sun protection, and weather layers for the full day.
- Stop if weather, rock conditions, route uncertainty, fatigue, or equipment condition makes the climb unsafe.
If you are new to climbing, hire a qualified guide or climb with experienced partners who can assess terrain, anchors, systems, and changing conditions. Do not learn technical rope systems solely from a blog, video, or social media post.
Sporting Equipment Checklist
Your one-week campground stay may include fishing, biking, paddle sports, cornhole, horseshoes, volleyball, pickleball, or other recreational activities. Plan the activity-specific safety needs in advance.
Fishing
- Valid fishing license, if required.
- Rods, reels, tackle, hooks, line, lures, bait, net, and pliers.
- Personal flotation device if fishing from a boat, dock with risk, or while wading in moving water.
- Sun protection, insect repellent, water, and weather layer.
- Needle-nose pliers and a small first-aid kit for hooks.
- Proper fish-storage plan if keeping a catch.
- Review local fishing regulations, seasons, size limits, and catch limits.
Bicycling
- Helmet for each rider.
- Tires inflated to the recommended pressure.
- Brakes tested.
- Chain lubricated and gears shifting properly.
- Front white light and rear red light if riding at dawn, dusk, or night.
- Lock, repair kit, pump or CO₂ inflator, tire levers, spare tube, and multitool.
- Water, ID, phone, and route plan.
- Bike rack, straps, and locking mechanism inspected before departure.
Paddle sports
- Coast Guard-approved personal flotation device for each person.
- Paddle, leash where appropriate, whistle, and dry bag.
- Weather, water temperature, current, and launch/return plan checked.
- Communication device protected from water.
- Sun protection, water, emergency layer, and footwear that stays secure.
- Do not paddle beyond your skill level or in unsafe weather, high water, or strong current.
Campground games and recreation
- Cornhole boards and bean bags.
- Horseshoes and stakes.
- Frisbee or football.
- Pickleball paddles, balls, and portable net if applicable.
- Lawn chairs and outdoor blanket.
- First-aid supplies for minor cuts, blisters, sprains, and insect bites.
- Reflective lighting or lanterns for evening use.
- Respect quiet hours, common-area rules, and other campers’ space.
One-Week Provision Checklist
The provision list below assumes two adults staying seven nights at a full-service campground with refrigeration, electricity, potable water, and access to a local grocery store if needed. Adjust quantities for children, guests, dietary needs, pets, and planned activity level.
Food and meal planning
Plan meals before shopping. A simple rhythm prevents overbuying and reduces waste:
- 7 breakfasts.
- 7 lunches, including portable trail lunches.
- 5–6 cooked dinners.
- 1–2 flexible nights for leftovers, a local restaurant, or a simple pantry meal.
- Daily snacks and hydration supplies.
- One weather-delay or power-outage shelf-stable meal.
| Category | One-week supply for two adults | Notes |
|---|---|---|
| Breakfast proteins | 12–18 eggs, yogurt, breakfast sausage/bacon, nut butter | Choose quantities based on meal plan and refrigeration space |
| Breakfast staples | Oatmeal, cereal, bread/tortillas, fruit, coffee/tea | Keep some shelf-stable options for travel day |
| Lunch proteins | Deli meat, tuna/salmon packets, cheese, hummus, cooked chicken | Pack raw and ready-to-eat foods separately |
| Lunch staples | Bread, wraps, crackers, salad greens, fruit, trail mix | Build lunches that can travel on hikes |
| Dinner proteins | 5–6 dinners’ worth of chicken, fish, beef, vegetarian proteins, or prepared meals | Freeze some meals for later in the week |
| Vegetables | Salad greens, onions, peppers, potatoes, broccoli, carrots, tomatoes, seasonal produce | Choose durable produce for later-week meals |
| Fruit | Bananas, apples, oranges, berries, grapes, melon as desired | Eat fragile fruit earlier in the week |
| Starches | Rice, pasta, potatoes, tortillas, bread, beans, quinoa | Shelf-stable items provide backup meals |
| Snacks | Nuts, bars, jerky, dried fruit, popcorn, crackers | Carry extra calories for hiking days |
| Hydration | Drinking water, electrolyte packets/tablets, coffee, tea | Verify campground water quality and personal preference |
| Cooking basics | Cooking oil, salt, pepper, spices, condiments, foil, zip bags | Refill travel-size containers to reduce clutter |
| Treats | S’mores supplies, cookies, hot chocolate, campfire dessert items | Follow campground fire rules |
| Backup food | Canned soup/chili, pasta, rice pouch, shelf-stable protein | Useful during storms, late arrivals, or appliance issues |
A sample seven-night dinner plan
| Night | Dinner idea | Why it works for RV camping |
|---|---|---|
| Night 1 | Grilled chicken, bagged salad, bread | Quick after arrival and setup |
| Night 2 | Tacos or fajitas | One-pan meal with flexible leftovers |
| Night 3 | Pasta with meat sauce or vegetables | Pantry-friendly and easy to scale |
| Night 4 | Grilled fish, vegetables, and rice | Light meal after a hiking day |
| Night 5 | Burgers or veggie burgers with corn and fruit | Classic outdoor dinner |
| Night 6 | Chili, stew, or Dutch-oven meal | Good for cooler evenings or rain |
| Night 7 | Leftovers, sandwiches, pizza, or local restaurant meal | Reduces food waste before departure |
Kitchen and cooking checklist
- Plates, bowls, cups, mugs, and reusable water bottles.
- Forks, knives, spoons, serving utensils, and sharp kitchen knife.
- Cutting board.
- Skillet, saucepan, pot, lid, and spatula.
- Grill tools, tongs, oven mitts, and thermometer.
- Coffee maker, pour-over system, kettle, or French press.
- Can opener, bottle opener, and corkscrew.
- Aluminum foil, parchment paper, plastic wrap, resealable bags, and food-storage containers.
- Dish soap, sponge, scrubber, dish towels, and drying mat.
- Paper towels, napkins, trash bags, recycling bags, and disposable gloves.
- Cooler with ice packs for travel day and beverage storage.
- Refrigerator thermometer and freezer thermometer.
- Fire-starting supplies only if campfires are permitted.
Personal, health, and comfort provisions
- Prescription medications for the full trip plus several extra days.
- Medication list, allergies, emergency contacts, insurance card, and identification.
- Basic first-aid kit.
- Pain reliever, antihistamine, anti-diarrheal medication, antacid, motion-sickness medication, and any personal over-the-counter needs.
- Sunscreen, lip balm with SPF, insect repellent, anti-itch cream, and after-sun lotion.
- Toiletries: toothbrush, toothpaste, shampoo, soap, deodorant, razors, contact-lens supplies, and feminine hygiene products as needed.
- Towels, washcloths, laundry bag, and travel-size detergent.
- Rain jackets, fleece or insulating layers, hats, sunglasses, and extra socks.
- Comfortable camp shoes or sandals.
- Flashlights/headlamps, lanterns, batteries, charging cords, and power banks.
- Camp chairs, outdoor rug, folding table, and shade canopy if allowed.
- Books, cards, board games, binoculars, camera, and journal.
- Earplugs and sleep masks if sensitive to campground noise or early daylight.
RV site and utility checklist
- Reservation confirmation and campground phone number.
- Site number, check-in procedure, gate code, and arrival-hour information.
- Wheel chocks.
- Leveling blocks or leveling system.
- Surge protector/electrical management system.
- 30-amp and 50-amp adapters as needed.
- Potable-water hose.
- Water pressure regulator.
- Inline water filter.
- Sewer hose, fittings, support, gloves, and disinfectant.
- Extension cord rated for outdoor/RV use, only if necessary and safe.
- Outdoor mat and broom.
- Spare fuses, bulbs, batteries, duct tape, zip ties, sealant, basic tools, and work gloves.
- Firewood only if permitted and locally sourced or sold onsite; moving firewood can spread invasive pests.
- Pet supplies if applicable: food, water bowl, leash, waste bags, bed/crate, medications, and vaccination documentation.
Departure-Morning Final Walk-Around
Before rolling out, perform the same walk-around every time. A checklist is valuable because travel-day distractions are common.
Interior
- Close and latch all cabinets, drawers, refrigerator doors, windows, vents, and interior doors.
- Stow loose dishes, appliances, chairs, tools, and outdoor gear.
- Secure TV, table, shower door, and any removable furnishings.
- Retract slides fully and verify clearance.
- Turn off unnecessary appliances and water pump if appropriate.
- Confirm refrigerator is operating on the intended travel power source.
- Check that all passengers have seat belts and that seating is safe for travel.
Exterior
- Retract and lock awning.
- Retract steps, jacks, stabilizers, and antennas.
- Lock every exterior compartment.
- Disconnect water, sewer, cable, and electrical hookups.
- Empty tanks as appropriate and confirm valves/caps are secure.
- Check tires one more time visually.
- Confirm hitch, chains, breakaway cable, electrical plug, and jack position for towables.
- Test running lights, brake lights, turn signals, and hazard lights.
- Check roofline, ladder, bike rack, cargo rack, and rear bumper for unsecured items.
- Walk completely around the RV one final time before moving.
- Confirm the route avoids low clearances, weight-restricted roads, unsuitable fuel stops, and difficult turns for your rig.
Arrival and Campsite Setup
Once you arrive at DeSoto Bluffs Campground or another full-service site, take your time. The safest setup is deliberate rather than rushed.
- Inspect the site before pulling in. Look for low branches, obstacles, soft ground, slope, utility-pedestal location, and adequate clearance for slides and awning.
- Position and level the RV. Place the RV properly, use leveling blocks or leveling systems as required, apply the parking brake, and chock wheels before unhitching a towable.
- Connect power safely. Inspect the pedestal, connect the surge protector, then connect the RV. Confirm normal voltage and correct polarity before running major appliances.
- Connect water with protection. Use a pressure regulator and potable-water hose. Open the connection slowly and inspect for leaks.
- Connect sewer carefully. Ensure secure fittings at both ends, keep hose supported, and follow proper tank-valve management.
- Set up the outdoor space. Place chairs, rugs, grills, games, and lighting without blocking roads, utility access, or neighboring sites.
- Review campground rules. Note quiet hours, fire policies, pet rules, trail guidance, trash procedures, emergency contacts, and check-out time.
- Create an activity station. Put hiking packs, water bottles, first aid, binoculars, trekking poles, climbing gear, and weather layers in one organized area so trail days begin smoothly.
Final Takeaway
A week at a campground such as DeSoto Bluffs should feel restorative, not like an extended repair project or a constant series of trips to the store. The best preparation focuses on the systems that matter most:
- Safe tires, brakes, hitching, lights, and towing setup.
- Working propane, electrical, smoke, carbon-monoxide, and fire-safety systems.
- Reliable water, sewer, refrigerator, and food-storage practices.
- Proper hiking, climbing, and recreation equipment matched to the planned activities.
- Enough food, water, medication, layers, and emergency supplies for a comfortable week.
Complete the inspection before departure, pack with a simple meal plan, check every outdoor item before heading out, and arrive ready to enjoy the campground—not troubleshoot it.